Thursday, 22 March 2012

Infant Puzzle Ball and other bits....

After a long break I'm hopefully finally back.  I'm finally starting to feel human again after two weeks of solid coughing.  Poor L is on spring break and I've been completely useless.
Anyhow here is my first "baby stuff" post.  How exciting.  First off I have to mention one of my new favourite blogs.  Little Red Farm has been such a wealth of information and inspiration with tons of tutorials.  If you have an infant or toddler be sure to check it out.

The first baby project my mom and I made were these Montessori infant puzzle balls.  Not only are they cool to look at but have little hand holds for the baby to grasp.  We used the tutorials from Little Red Farm and The Secret of Childhood.
I have to say I do not sew and would never have attempted these without the help of my mother but they are fun to make and the results are stunning.

We also made this little ribbon blanket.  The ribbons are all different textures and the blanket is made out of lovely soft fleece.  So super easy to make.  I cut out all the ribbon pieces and two squares of material and then my mom sewed it all together. 

With some left over fabric we made this much smaller little rattle for the baby to be able to grasp before the puzzle balls.  It is so light and perfect for a tiny hand to grasp.  I also put a bell in one end.

Sunday, 26 February 2012

Montessori Beginnings

Well things are going to be changing around here big time very soon.  Not just this blog but our family too!!
We are expecting our second child in early May!!  L is sooo excited to be a big sister and I am over the moon.  This is one of the main reasons my blogging has been sporadic at best. 

I didn't really find the Montessori method until L was about 12 months old so we missed out on all of the early infant Montessori.  I'm so excited to be able to start right from the beginning with this next one and hence the blog name change back to the original Montessori Beginnings.
We are going to set up our new baby's room in the Montessori design with a floor bed, mirror, mobiles and more.  From now on I will be not only posting about the things L and I do together but also about my preparations for the new baby.
I've found some fabulous blogs to help me with my preparations that I will be mentioning and linking to in some upcomming posts. 
Stay tuned to see if L is going to have a little brother or sister....

Wednesday, 22 February 2012

Pumpkin Wildlife Cookies

My mom bought L the coolest cookie cutters the other day.  We were desperate to try them out and also tried out a new  recipe for pumpkin cookies.  They made a nice change from our usual gingerbread cookies.


So cute and yummy!  L is becoming quite the baker!
Here is the recipe for any who would like to try them out.

Pumpkin Cookies

1/2 cup brown sugar or honey
3/4 cup butter
1tbspn orange zest
1/2 cup pumpkin pie mix
1 egg white
1tspn vanilla
21/4 cups whole wheat flour
1/4 tspn each of cinnamon, nutmeg and ground ginger
pinch of salt

In a medium bowl cream the butter, brown sugar(or honey)and orange zest together.  Stir in the pumpkin then add the eggs and vanilla and mix well.
In another bowl sift together flour, cinnamon, ginger, nutmeg and salt.  Stir into the pumpkin mix.  Chill for 30 min.  Cook for 10-12 minutes at 375degrees C.
Next time I think I will reduce the amount of butter as I found they were pretty oily and moist.  It could have been the type of pumpkin mix I used.


Wednesday, 8 February 2012

Auroras

We found this beautiful book about the story of the Northern Lights at the library recently.  It is beautifully written and illustrated by Mindy Dwyer.   After reading it L had a lot of questions about what exactly the Northern Lights are.

 I found this little story on the Internet about the Aurora Borealis and Australis that L could read herself.  We also looked at several pictures on the Internet and watched this wonderful video.
Then it was time to do some hands on. 
We covered out sheets of water color paper with dark blue watercolour paint.  Once it was dry we used black paint to do our silhouettes of the trees, mountains and a little cabin.  We also added a bit of white for snow.
Once the paint had dried we drew dark thick lines across the sky with different colored chalk and then blended them by wiping a paper towel across them.
Here are the finished products.  L's is on the top and Mommy's is the bottom one.

They ended up being quite effective and L proclaimed "They look just like in the book!"

Thursday, 2 February 2012

Money Work

L has been saving her coins in her piggy bank for ages now and we decided it was time to roll them so she could take them to the bank.  L gets spare coins from us and also gets to keep the money from helping to return the bottles to the bottle depot.
The last time we did this L just helped to sort the coins and put them in the rollers.  This time we added all the steps and also turned it into a lesson about money.

First step.  Sort the coins.  Turns out we had quite a few American coins as well so we had to talk about the difference and the fact that our banks will take American coins(although I'm pretty sure it doesn't work the other way around!)


While we were doing this we looked at the Canadian coin sheet I printed out and talked about the names of the coins and what was on each one.
Once we had finished sorting L found each of the coins to match the amounts I wrote out on another piece of paper and we talked about how much each coin was worth.

 We started with the pennies.  I made this sheet for her with columns in tens to help her count out the 50 pennies needed to go into the roller.

 The most rewarding part.  Putting the pennies into the roller.  She was so proud that she'd done it all herself this time!  She then moved on to the dimes and used the same sheet for $5.00 this time.
We didn't get through all of the coins so we will continue this work another day and then L will take all of her rolled coin to the bank to deposit into her account.  She knows we use this money to pay for dancing, skating and swimming lessons and for skiing.  I think it's great that she is learning to contribute to pay for the things she likes to do.

Sunday, 29 January 2012

Lovehearts Art

While I was checking out Kathy Barbro's tutorial for the Winter Birches over at the fantastic blog Art Projects for Kids I came across this super cool Valentine's art project.
L is super excited about Valentine's Day this year which she calls Lovehearts Day.

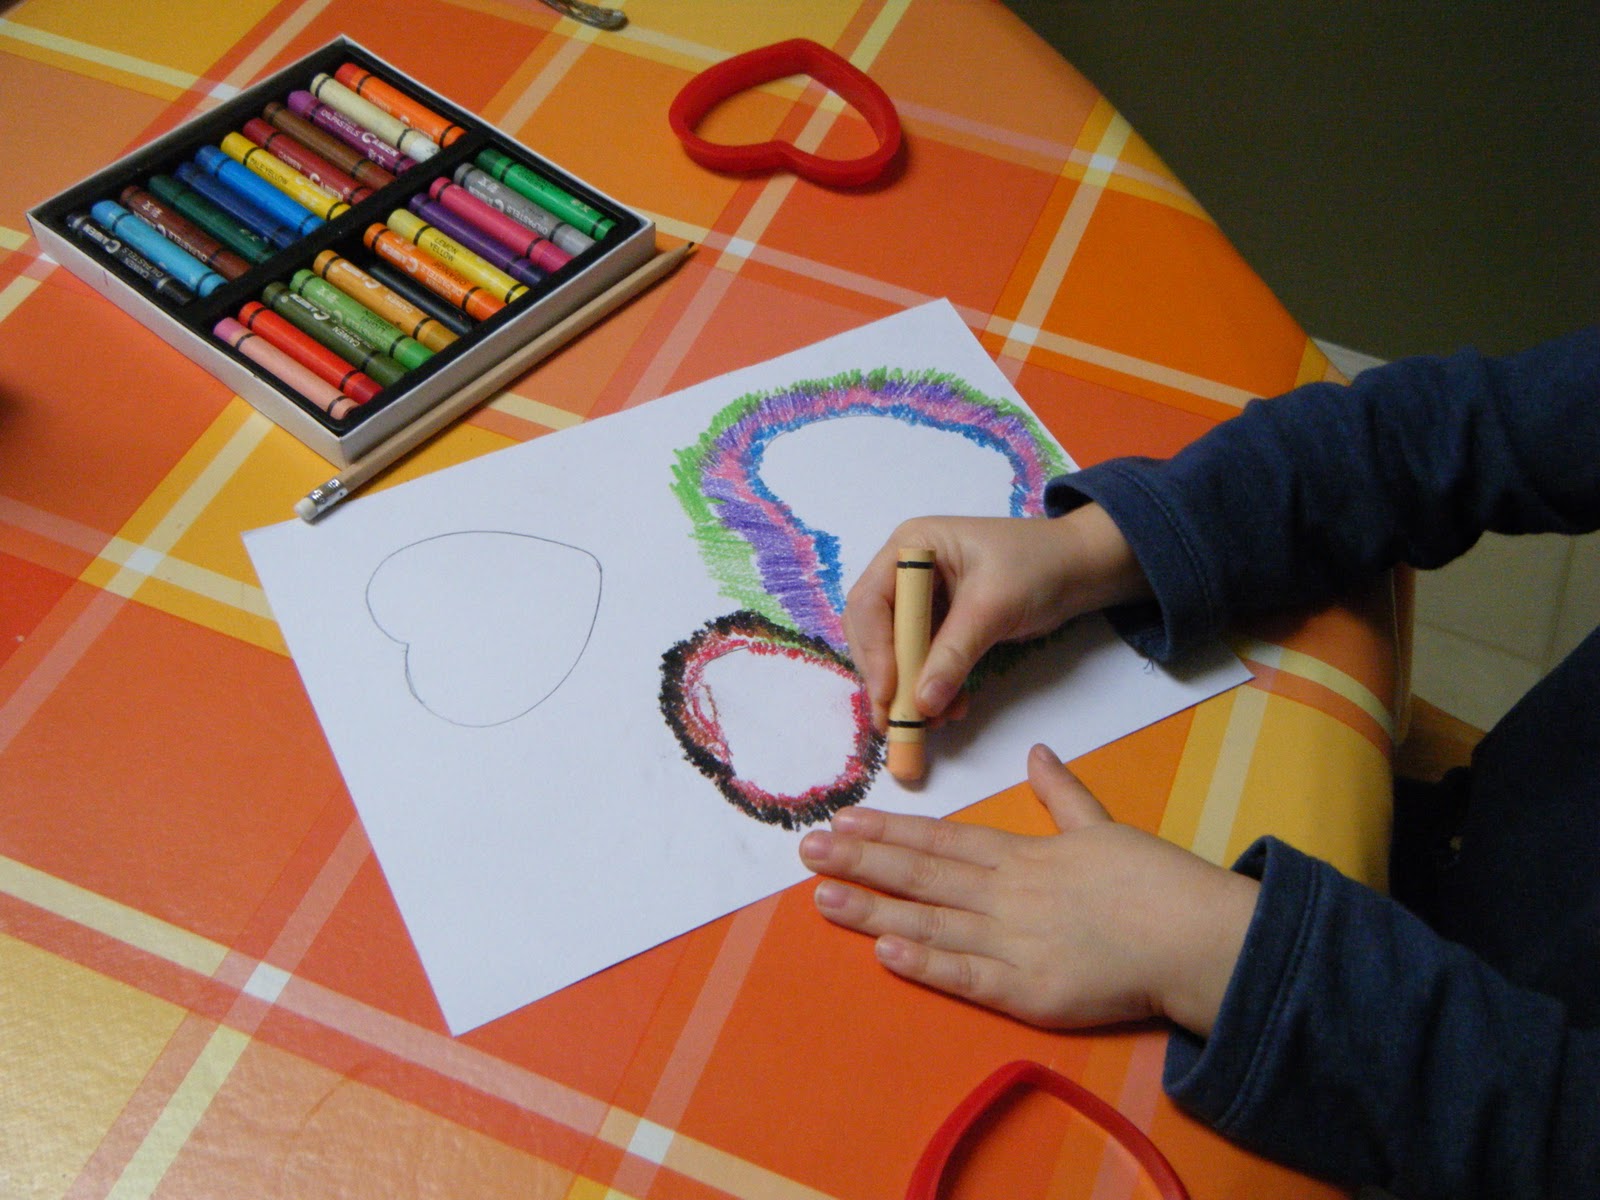
I was also excited to finally use the oil pastels I bought months ago.  We did the project on some leftover water color paper.  We used three different sized heart shaped cookie cutters to trace our hearts onto the paper.
L then chose her first color and outlined a heart with zigzag lines.  She did that about three times for each heart in different colors and then kept filling in more and more colors.  This was a pretty long project and I had to keep encouraging her towards the end but the result was totally worth it!


Here are the finished products.  L's is on the left and Mommy's is on the right.

Friday, 20 January 2012

Easy, beautiful artwork

When I saw this gorgeous Winter Birches art project over at Wee Folk Art I knew it was one L and I would have to try out right away.
After having a fairly mild winter we finally got snow this week and L had a snow day.  It was the perfect day to bake cookies and try out this painting.
 This beautiful piece of artwork was so easy to make.
For a full tutorial with step by step pictures go to Wee Folk Art.  They used painters tape but since we didn't have any on hand I just used masking tape.  It took off a little of the paper but in the end it still looks great and I think it adds a nice texture.


We haven't done a project like this in a while and it reminded me of how much fun it is to get out the paints and do artwork together.  Thank you Wee Folk Art for posting about this great project.

Related Posts with Thumbnails