Showing posts with label art. Show all posts

Thursday, 3 July 2014

African Canvases

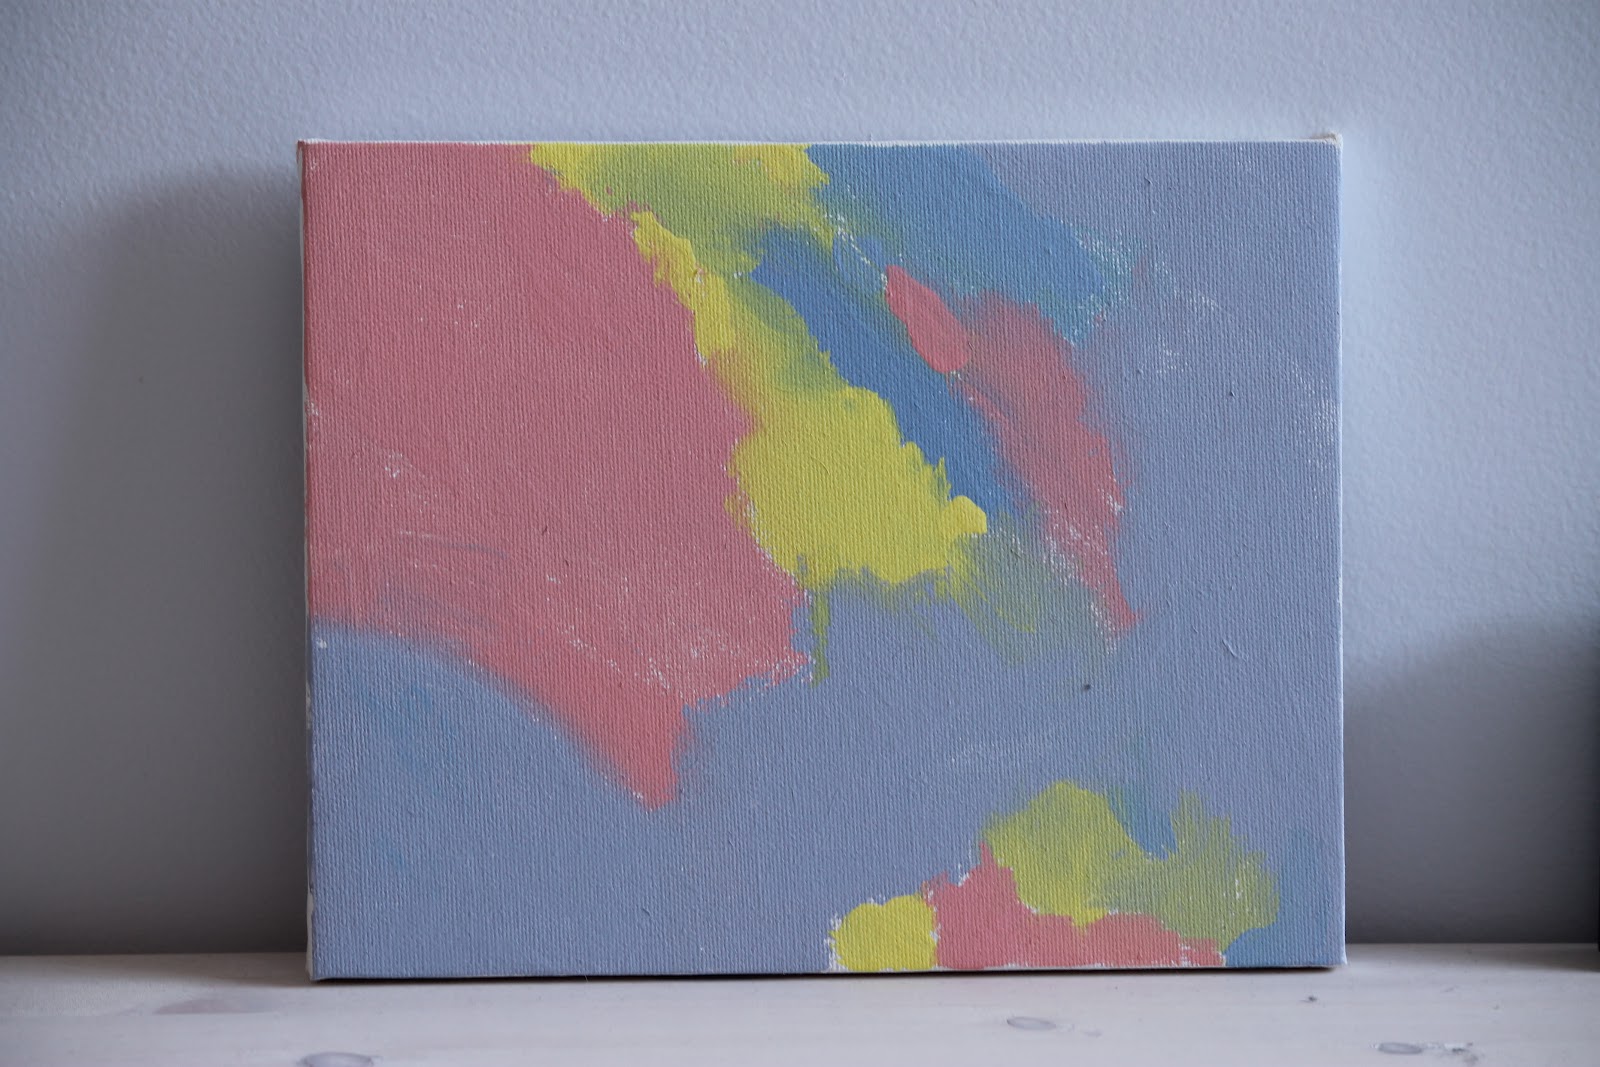
 We made some art for the kids bedrooms over the weekend.  I've wanted to do more resist paintings for some time now and we finally got around to it.

L painted a previously used canvas black.  While she was doing that I looked through Google images for some giraffe and elephant silhouettes.  I copied them into a word document and scaled them to the appropriate sizes.  We then cut them out and traced them onto some black contact paper.  Once we'd cut them out a final time we arranged them on the canvases.

L and LJ got to work painting over the whole canvas.  L decided to make an African sunset and I just gave LJ colours that matched his bedroom.


All painted and waiting for them to dry before peeling off the contact paper.


Here are the finished products.  I did a bit of touching up around the edges and then we hung them on their walls.  I love this way of painting.  So easy yet so effective!


Monday, 21 October 2013

Toddler Art

It was high time to change the art in LJ's bedroom.  I was excited to try something with both L and LJ this time.
I first found a silhouette of a frog and seahorse on Google images and printed them out.  I cut them out and traced them onto black contact paper.  Once I stuck them on the canvass I let the kids have atter.
 
As I was browsing the Internet I saw a brilliant idea for toddlers and painting.  Instead of having them dip the brush into the paint pot and make a huge mess the idea is to just dab drops of paint all over the canvass for them to paint.
.

It worked a treat and LJ really enjoyed painting the canvass with very little mess and stress for mom.

 
L of course chose her own colors and animal for the canvass.

 
After the paint had dried we peeled off the contact paper and were left with beautiful artwork!

LJ loves the new art hanging on his wall and is constantly pointing to his painting and telling me it's a frog!.

Wednesday, 20 February 2013

Elephant art for Baby J's room

Baby J's room was long overdue for some new artwork.  L and I had some time this weekend so we tried out this cool project from Art Projects for Kids.  This is a fantastic site which we've done several projects from in the past.
A step by step tutorial is given on how to draw the elephant.  The tutorial is for watercolours but we used canvass and acrylic paint.
 
They turned out even better than I'd hoped.


This is L's.  She did everything herself except for the black outline.  She said she wanted there to be grass and sky.  I just love how it turned out.  It could be an illustration in a children's book.
 
 
This is mine.  I'm not sure why he turned out so serious looking!
This was a very easy yet effective art project that didn't take too long to do.  Thank you Art Projects for Kids!

Tuesday, 20 November 2012

More baby art and butterfly mobile

 
L and I made these leaf prints back in October for the space above Baby J's change table.  This picture is not the best but they are made up of a rainbow of beautiful fall colors.
 
 
I decided I wanted to make a butterfly mobile for above Baby J's bed like the one in the Micheal Olaf catalogue.  When I started doing some research on the computer I came across this SUPER COOL idea.  These butterflies are all made out of a recycled milk jug!! All you do is cut out pieces from a washed milk jug and tape them on top of the butterfly templates found on this blog.  L colored in the colors with permanent markers and then I traced the outlines with a black marker.  We cut them out and wound a thin pipe cleaner around the body using a couple beads for the abdomen and head.

 The super tricky part was trying to balance them to hang.  I ended up cutting four small pieces of invisible thread and glue gunning them to the top side of each of the wings.  I tied the four pieces together and then tied a longer line on to hang them.  Super complicated but they balance perfectly and are really stable.
The milk jug butterfly mobile was a hit with both L and Baby J!  

Monday, 30 July 2012

New baby art and an extension

I decided it was time to change the artwork above Baby J's change table.  He previously had these black and white stars.
I bought some more small canvases from the Dollar store.  With the help of my mom I painted L and Baby J's hands and feet and we put them on the canvases.  It was lots of fun for L and Baby J didn't seem to mind either.  He's a pretty easy going little guy.
We hung them up today but he hasn't noticed them yet.

Recently I exchanged the bells for this puzzle ball on an elastic for Baby J to start kicking.  Usually when I'm not using one I wrap it around the top of the tripod.   On this occasion the puzzle ball had come unwrapped.  Baby J wasn't much into hitting the ring until he realised that hitting the ring made the puzzle ball move as well!  He was hooked!  He lay there for at least 20 minutes hitting the ring just to watch the puzzle ball move.  Already making up his own extensions : )

On a side note the first time I hung the puzzle ball I put Baby J down and quickly went to the bathroom.  I came back to find L bouncing the ball off his head!  Thank goodness it's soft!

Thursday, 24 May 2012

Baby Art

When deciding how to decorate the nursery I really wanted to include L.  One of the first things we made were these little black and white paintings hanging above baby J's change table.  I am amazed at how attracted he is to them.  He will stare at them the whole time he is being changed and sometimes I will have to wait until he is done studying them before I pick him up.  They are just little canvases from the Dollar store and I plan on changing them every few months or so.

 L also painted this little canvas matching the colours of the nursery.  She really enjoyed being part of the decorating process.
 One of baby J's first mobiles.  I really love the black and white baby art cards from Wee Gallery but couldn't bring myself to actually fork out the money to buy them plus the mobile so I just got my own black sharpie and some white card stock and totally copied the pictures from the website.  I bought some alligator clips and made up my own little mobile.  I have put baby J under them in his Moses basket.

Wednesday, 8 February 2012

Auroras

We found this beautiful book about the story of the Northern Lights at the library recently.  It is beautifully written and illustrated by Mindy Dwyer.   After reading it L had a lot of questions about what exactly the Northern Lights are.

 I found this little story on the Internet about the Aurora Borealis and Australis that L could read herself.  We also looked at several pictures on the Internet and watched this wonderful video.
Then it was time to do some hands on. 
We covered out sheets of water color paper with dark blue watercolour paint.  Once it was dry we used black paint to do our silhouettes of the trees, mountains and a little cabin.  We also added a bit of white for snow.
Once the paint had dried we drew dark thick lines across the sky with different colored chalk and then blended them by wiping a paper towel across them.
Here are the finished products.  L's is on the top and Mommy's is the bottom one.

They ended up being quite effective and L proclaimed "They look just like in the book!"

Sunday, 29 January 2012

Lovehearts Art

While I was checking out Kathy Barbro's tutorial for the Winter Birches over at the fantastic blog Art Projects for Kids I came across this super cool Valentine's art project.
L is super excited about Valentine's Day this year which she calls Lovehearts Day.

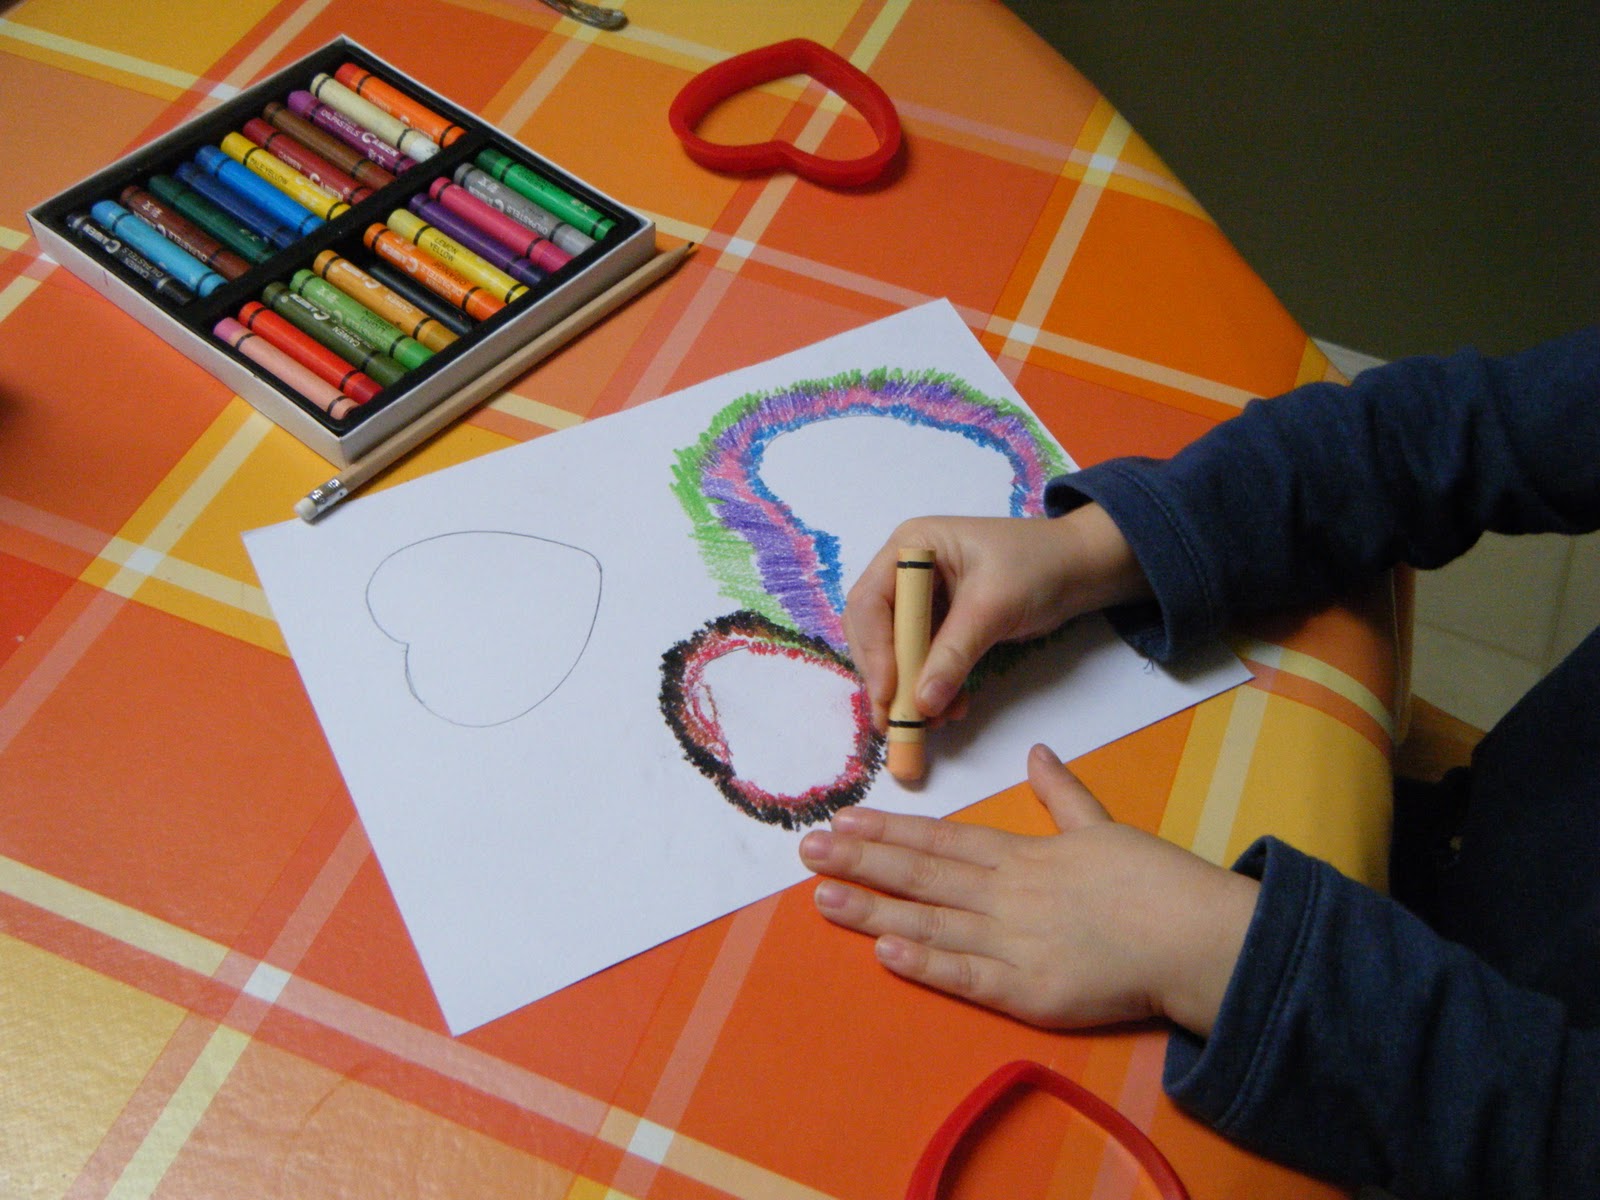
I was also excited to finally use the oil pastels I bought months ago.  We did the project on some leftover water color paper.  We used three different sized heart shaped cookie cutters to trace our hearts onto the paper.
L then chose her first color and outlined a heart with zigzag lines.  She did that about three times for each heart in different colors and then kept filling in more and more colors.  This was a pretty long project and I had to keep encouraging her towards the end but the result was totally worth it!


Here are the finished products.  L's is on the left and Mommy's is on the right.

Friday, 20 January 2012

Easy, beautiful artwork

When I saw this gorgeous Winter Birches art project over at Wee Folk Art I knew it was one L and I would have to try out right away.
After having a fairly mild winter we finally got snow this week and L had a snow day.  It was the perfect day to bake cookies and try out this painting.
 This beautiful piece of artwork was so easy to make.
For a full tutorial with step by step pictures go to Wee Folk Art.  They used painters tape but since we didn't have any on hand I just used masking tape.  It took off a little of the paper but in the end it still looks great and I think it adds a nice texture.


We haven't done a project like this in a while and it reminded me of how much fun it is to get out the paints and do artwork together.  Thank you Wee Folk Art for posting about this great project.


Saturday, 8 January 2011

Die Moldau

Being a musician myself one of my hopes is that I can instill the same love of music in my daughter.  My approach to introducing L to music is not to have her know all of the composers, when they were born and what they look like.  To me at three years old those things are irrelevant and not necessary.  I would much rather have L really listen to and appreciate music.  Have her be able to really feel something when she hears a piece and be able to listen well enough to hear different changes in melody, instrumentation, tempo and dynamics. 

To start L's introduction to Classical music I have used program music.  This type of music is composed to tell a story.  I think this is the easiest way for L to hear how composers manipulate music and instruments to represent different things or ideas.
This week our piece was Die Moldau, a gorgeous symphonic poem by Bedrich Smetana which describes the sights and sounds along the banks of the Moldau or Vltava river that flows through Prague.
L and I listened to the music a few times and talked about the different "themes" such as a Peasant wedding,  the great castle and even water nymphs.  We then looked at some pictures from the Internet.

Once we had an idea in our heads we set to work painting our scenes.
Here is our voyage along the Moldau river.
(I've included the timings in for each scene from this Youtube recording)

The piece begins with two flutes each playing fast moving notes to represent two little streams or tributaries that flow into the Moldau.
You can see our pillow boats on the side waiting until we get to the bigger river.
The stream pattern is then passed on to the lower strings to represent the streams joining(00:53) and flowing into the main river.  This is where we get in and listen to the main river theme played by the violins (00:59).
Okay we're on our way.  First off we pass by a grand forest and we can hear the the French horns and trumpets introducing the "Hunting in the Forest theme"(1:54)
We then float along the banks and can hear the music from a Peasant Wedding(2:48).  We moor our pillow boats and get off to dance with the guests.
We dance until late into the night and the moon comes out.  We climb back onto our boats just in time to float past some water nymphs frolicking in the moonlight which is played by the two flutes again(4:27).
We continue along and hear the river theme again(6:38).  The river gets choppier and choppier as the music gets more agitated(7:17).  Finally with great excitement we go down "The Rapids of St. John" and the huge waterfall(8:18).  Phew we held on tight and didn't fall out of our boats!
Around the bend and the "Ancient Castle Vysehrad" (8:31)comes into view introduced by a regal theme played by the brass.  We wave to the people in the castle and stare in awe at it's grandeur.
Then it's time to move along the river as the music becomes calm again(10:00) and we've finished our journey.
L was so excited to take Granny on the Moldau she woke us all up at 6:30 with the pillow boats ready!

Here are some other posts on the music and compositions we've explored so far:

I've linked this post up to The Adventures of Bear's Artists and Art series.  To see more in the series go to the button on the right side bar.

Sunday, 7 November 2010

Window Crayons Rock!

L got some Crayola window crayons from a neighbour for Halloween.  We tried them out the other day and they totally rock!!! I can't believe I didn't know about these before.  We both spent ages coloring and creating.
The best bit is not only is it a great artistic and creative activity but it's also a fantastic practical life activity.  L enjoyed wiping down the window with a wet cloth and drying it just as much as the coloring!!


Friday, 24 September 2010

The Four Seasons Vivaldi style

Lately we've been listening to Antonio Vivaldi's The Four Seasons.
I painted four of these bare trees for each of us.  I then put on one of the seasons and while we listened to it we talked about that season and painted our tree how it would look at that particular time of year. 

I hung the finished products up by our kitchen table so we can talk about them and see them whenever we eat.  We can also see the changing season out the windows as we talk.
The next activity we did was focusing on a specific season and that was Spring.  We listened to the first movement and focused on the form.  In this movement there are four particular themes that you can hear.  We have a different scarf for each theme.  The green scarf represents the trees, colorful red birds, blue river, black and gold thunderstorm and pink and yellow sunshine.
At first I called out each theme as it came and L picked up the corresponding scarf and waved it like a tree or bird etc.
The second time she was able to hear the themes herself and had a ball running back and forth picking up the scarves as the music changed.
The order is trees,birds,trees,river,trees,thunderstorm,trees,sun,trees,sun and trees.  They are quite easy to identify after listening to it a few times and as I said even L got them after the second try.
I got this fantastic idea from here.

While I was searching for a recording of The Four Seasons on Youtube I came across this these amazing videos of sand animation.  The whole family watched them totally amazed and L and I wanted to try it for ourselves.
So here we are in our tiny bathroom in the dark : )
I used a deep white plastic tray and rested it between two small stools.  We added some sand and put a reading lamp underneath the tray.  I had the laptop in there as well and we watched the videos as we drew.

Here are some of L's impressions. 


This was so fun and cool and I know we're going to be going into the bathroom quite often : )  It would also be a novel way to learn how to write letters.
Check out the artists and art button on the right to see what others have done this week.


Thursday, 1 July 2010

Peter and the Wolf

 We've been learning about different instruments and their sounds for about a year now and I printed out some instrument cards for L to name.  We also talked about the different families the instruments belong to-woodwind, brass, strings and percussion and sorted the cards into each of their families.

Yesterday L and I listened to my recording of Peter and the Wolf together.  You can hear a similar version here.  We cuddled on the couch and she loved being scared of the wolf.  When it was done she asked for it a second time and we acted out all of the characters as the instruments played.
We then got out the water colors and painted each of the characters.  At first she was quite abstract but as she went on they became more realistic.  You might be able to make out the Grandfather at the top and a tree and pond on the right.  Anyway I also painted some with the idea of making puppets.


As soon as I got out the scissors L wanted to cut hers out too.  So we made two sets of puppets.
After dinner we put on a puppet show for Daddy while the CD played.  It was fantastic.  L was so into it and SO serious about the whole thing.  She just couldn't wait for the wolf to come on so she could make her ahooo sounds.
Today we put the show on again for Granny with equal excitement and then matched the characters up with their instruments.
This is a wonderful way to introduce children to music and the instruments of the orchestra.

Tuesday, 22 June 2010

Pressed Flowers

We are so lucky to be living with my mother who is such an avid gardener.  There are so many beautiful flowers in our back yard we just have to take advantage of them.
L got this cute little flower press for Christmas and has been desperate to use it. 

L and Granny picked some flowers and then put them between the cardboard pieces.  We tightened down the ladybug screws and left them for a few days.

L was delighted with her pressed flowers and glued them on to this black piece of card.  She then picked a little whit clover and used it as a paint brush. We both thought the result looked really cool.
Related Posts with Thumbnails